
Thyme, a fragrant herb that is a staple in many kitchens around the world, not only enhances the flavor of dishes but also offers medicinal benefits. Growing thyme from cuttings is an effective way to propagate this versatile herb. Among various propagation methods, using water to root cuttings has gained popularity due to its simplicity and efficiency. In this article, we’ll delve into the water method for rooting thyme cuttings, detailing the steps, benefits, and care tips to ensure successful propagation.
Understanding Thyme: The Basics
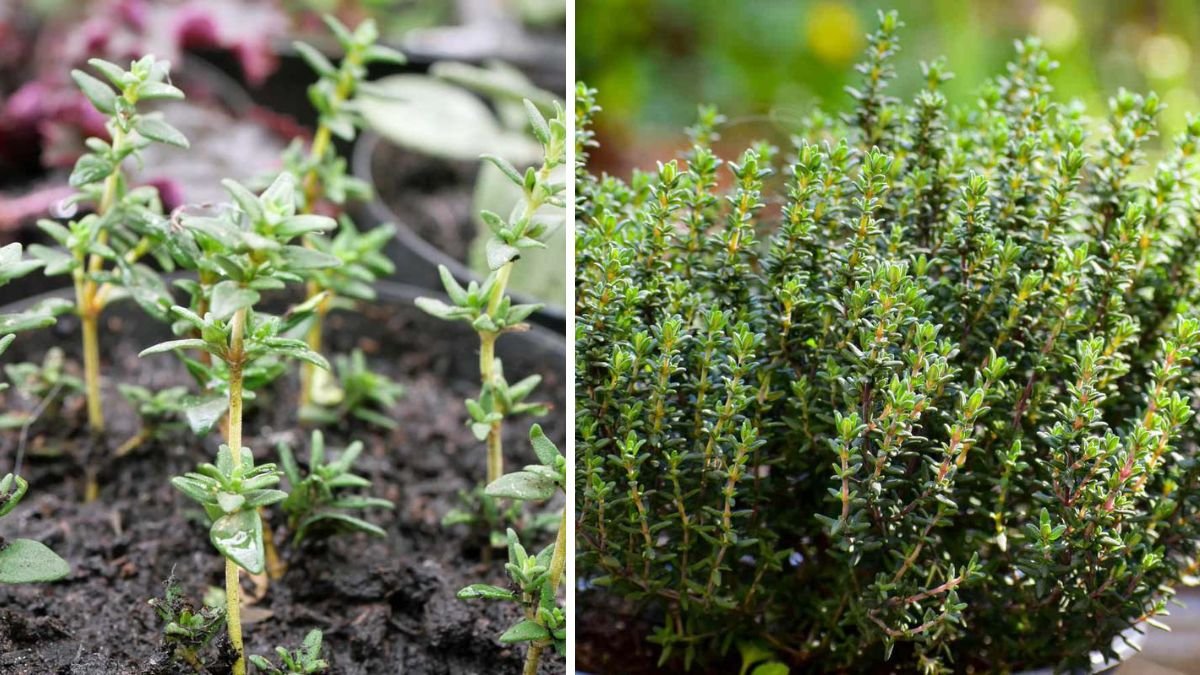
Thyme (Thymus vulgaris) is a perennial herb belonging to the mint family. It thrives in well-drained soil and full sunlight, making it an excellent addition to gardens and patios. With its small, aromatic leaves, thyme is used in cooking and has been valued for its antiseptic properties and other health benefits.
Why Propagate Thyme?
- Cost-Effective: Instead of purchasing new plants, you can easily create your own.
- Satisfaction: Watching a plant grow from cutting to a flourishing herb can be fulfilling.
- Variety: You can experiment with different thyme varieties by propagating them.
The Water Method: Overview
The water method for rooting cuttings involves placing the cut stems in water, allowing them to develop roots without the immediate need for soil. This method is simple and highly visual, making it easy for beginners to see the progress of their cuttings.
Step-by-Step Guide to Rooting Thyme Cuttings in Water
Step 1: Gather Your Materials
To get started, you’ll need:
- Healthy thyme plant
- Clean scissors or pruning shears
- A clear glass or jar
- Fresh, clean water
- Optional: A plastic bag or a clear cover
Step 2: Select the Cuttings
Choose stems that are green and healthy. Look for stems that are not flowering, as the best cuttings come from vegetative, non-flowering shoots. Aim for cuttings that are about 4 to 6 inches long.
Step 3: Make the Cut
Using your clean scissors, make a cut right below a leaf node (the area on the stem where leaves emerge). This is crucial since roots will develop best from nodes. Trim off any flower buds or blossoms on the cutting to focus the plant’s energy on root development.
Step 4: Remove Lower Leaves
Strip away the leaves from the lower half of the cutting, leaving a few leaves at the top. This reduces the energy expenditure of the cutting and helps prevent rot in the water.
Step 5: Place in Water
Fill your glass or jar with clean, room-temperature water. Drop the prepared cutting into the water, ensuring that the leaf nodes are submerged while the remaining leaves stay above water. You may want to use multiple cuttings in a larger container.
Step 6: Positioning
Place the jar in a warm, well-lit area but out of direct sunlight. A windowsill with filtered light is perfect. If the sun is too intense, consider using a sheer curtain.
Step 7: Change the Water
Replace the water every few days to keep it fresh and oxygenated. This will prevent the growth of algae and bacteria that can harm the cutting.
Step 8: Wait for Roots to Develop
With proper conditions, you should start to see roots developing in a week or two. The roots will typically grow about 2 to 4 inches long, which is the optimal length for transplanting.
Step 9: Transplanting
Once the roots are developed, it’s time to move your thyme cuttings into soil. Prepare a pot with quality potting mix or garden soil. Make a small hole in the soil, place the cutting in gently, and cover the roots with soil. Water it lightly to ensure good soil contact.
Step 10: Care After Transplanting
Keep your newly potted thyme cutting in a warm, sheltered spot with indirect sunlight. Water it regularly, allowing the top inch of soil to dry out before re-watering. Gradually introduce it to more sunlight to strengthen the plant.
Benefits of Rooting Thyme Cuttings in Water
- Easy Observation: The water method allows you to visually monitor root development.
- Reduced Risk of Rot: Compared to soil methods, the chance of rot is minimized, as you can change the water frequently.
- No Immediate Soil Needed: You can start rooting without the need to prepare a potting mix.
Troubleshooting Common Issues
- Rotting Cuttings: Ensure that the water is changed regularly, and avoid letting any leaves touch the water.
- No Root Development: If roots do not develop, check if the cuttings are healthy and ensure proper positioning in light.
Final Thoughts
Rooting thyme cuttings in water is an accessible and rewarding method for herb propagation. With just a few materials and steps, you can enjoy the benefits of home-grown thyme. Whether for culinary use or as a beautiful garden addition, propagating thyme can enhance your gardening experience.
FAQs
1. How long does it take for thyme cuttings to root in water?
Typically, thyme cuttings take about 1 to 2 weeks to develop roots when placed in water under optimal conditions.
2. Can I propagate thyme in soil instead of water?
Yes, thyme can be propagated in soil as well. For soil propagation, place the cutting directly into moist potting mix and keep it in a humid environment until roots develop.
3. What is the best time of year to take thyme cuttings?
The best time to take thyme cuttings is in spring or early summer when the plant is actively growing.
4. Do I need to use rooting hormone for water propagation?
No, rooting hormone is not necessary for the water method, though it can help improve success rates if using soil propagation.
5. Can I propagate other herbs using the water method?
Yes! Many herbs such as basil, mint, and rosemary can also be propagated using the water method.
6. How can I ensure my thyme plants are healthy?
To keep your thyme healthy, ensure they receive adequate sunlight, water them properly, and prune regularly to encourage bushy growth.
Conclusion
With this simple trick to root thyme cuttings using the water method, you’ll find success in propagating this delightful herb. Whether for culinary, therapeutic, or aesthetic purposes, your thriving thyme plants will be a wonderful addition to your garden or kitchen. Happy gardening!