

Garlic is one of the most essential plants in every kitchen, yet few people know how easy it is to grow at home—especially using a special breeding method that dramatically speeds up growth and produces large, healthy bulbs. If you’ve ever planted garlic only to wait endlessly for a harvest or ended up with small, underdeveloped cloves, this guide will transform your results.
This fast-growth method is becoming popular among gardeners around the world because it not only shortens the waiting time but also boosts bulb size, increases the number of cloves per head, and enhances the overall quality of the harvest. Even beginners can achieve impressive success using this simple technique.
Let’s dive into the step-by-step method to grow garlic quickly and harvest earlier than ever before.
🌱 Why This Breeding Method Works

Traditional garlic planting requires patience—around 6–8 months for full maturity. But with this breeding method, growth accelerates because:
✔ Roots activate earlier
Preparing and sprouting cloves before planting jump-starts root development.
✔ Plants receive early nutrients
Feeding garlic at the right time speeds up leaf and bulb formation.
✔ Optimized spacing increases bulb size
Properly spaced garlic grows bigger, as each bulb gets enough air and nutrients.
✔ Moisture control prevents slow growth
Garlic thrives in controlled watering environments.
When all these factors work together, garlic matures weeks earlier and produces a better harvest.
🧄 Step 1: Choose Healthy Garlic for Breeding
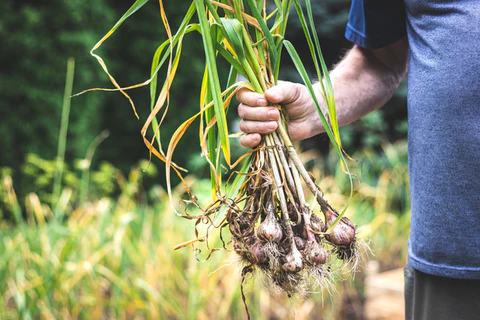
Select high-quality bulbs for planting:
- Large bulbs with plump cloves
- No signs of mold or rot
- Firm texture
- Preferably local or organic varieties
Avoid imported garlic treated to prevent sprouting—it will grow slowly.
🌿 Step 2: Separate the Cloves Correctly
For fast-growing garlic:
- Gently separate cloves without damaging the skin.
- Keep the papery layer intact—it protects the clove from rot.
- Select medium-to-large cloves for planting; small ones produce small bulbs.
Keep them dry and clean before sprouting.
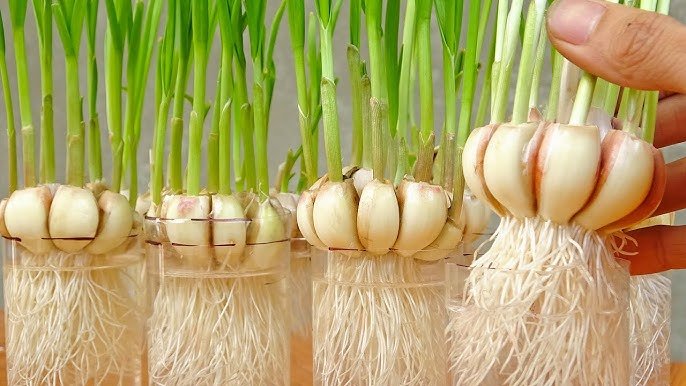
💧 Step 3: Pre-sprouting — The Secret to Faster Harvest

This is the core of the fast-breeding method.
How to pre-sprout garlic:
- Soak the cloves in clean water for 4–6 hours.
- Remove and drain completely.
- Place cloves in a container lined with paper towel or cloth.
- Keep them in a warm, shaded place for 2–3 days.
- Once the roots and small green shoots appear, they are ready to plant.
Pre-sprouting helps garlic:
- Establish faster
- Grow stronger roots
- Produce bulbs earlier
- Resist diseases better
This single step can reduce harvest time by 2–3 weeks.
🪴 Step 4: Prepare Nutrient-Rich Soil
Garlic loves loose, fertile, well-draining soil.
Perfect soil mix:
- 40% garden soil
- 40% compost or well-rotted manure
- 20% sand or cocopeat
- 1–2 handfuls of wood ash (potassium-rich)
- A small amount of bone meal (optional, boosts root growth)
The soil should be light and airy so bulbs can expand easily.
🌿 Step 5: Plant Garlic the Right Way
Planting depth:
- Plant cloves 2–3 inches deep, pointed end facing up.
- Space each clove 10–12 cm apart.
Planting environment:
Garlic can grow in:
- Pots
- Grow bags
- Raised beds
- Balcony containers
- Garden soil
Just make sure the location gets minimum 5–6 hours of sunlight.
Proper spacing is essential for faster growth and larger bulbs.
💦 Step 6: Watering — The Key to Quick Growth
Garlic loves moisture but not waterlogging.
Follow this watering routine:
- Water lightly after planting.
- Keep the soil moist for the first 2 weeks for strong root establishment.
- After plants grow 3–4 leaves, water only when the top layer dries.
Avoid:
- Overwatering
- Wetting the leaves
- Water pooling around the bulbs
Correct watering helps bulbs form faster and healthier.
🌱 Step 7: Boost Growth With Early Feeding
Garlic is a heavy feeder. Proper nutrition speeds up growth and bulb formation.
Feed your garlic every 15–20 days with:
- Compost tea
- Banana peel water (for potassium)
- Epsom salt water (1 tsp in 1 liter to support leaf growth)
- Seaweed extract (optional but excellent)
Special early-growth booster:
Mix:
- 1 cup vermicompost
- 1 tsp wood ash
- ½ tsp crushed eggshell
Sprinkle around each plant and water lightly.
This encourages strong leaves—which directly affect bulb size and speed.
✂️ Step 8: Remove Scapes for Bigger Bulbs
If you are growing hardneck garlic, you might notice curly green stems called scapes.
Cut them off when they appear.
Why?
✔ Scapes steal energy
✔ Removing them makes bulbs grow bigger
✔ They delay harvesting if left intact
Bonus: Scapes are edible and delicious!
🍂 Step 9: Mulch for Faster Growth
Mulch is essential for two reasons:
- Maintains soil moisture
- Prevents weeds from stealing nutrients
- Keeps soil temperature stable, which garlic loves
Use:
- Straw
- Dry leaves
- Grass clippings
- Coco husk
A 2–3 cm layer works best.
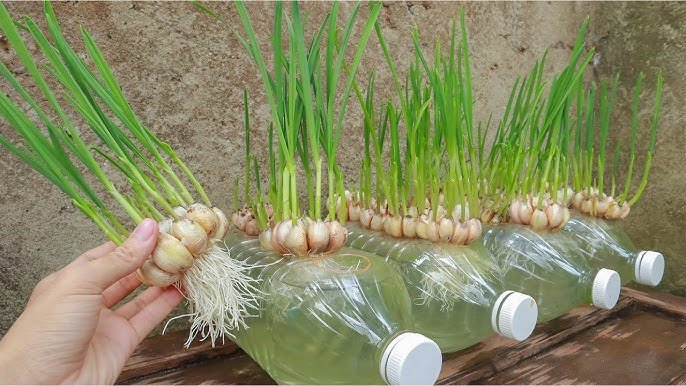
🌤️ Step 10: Garlic Growth Timeline (Fast-Track Version)
Using the breeding method, your garlic will grow like this:
- Week 1: Shoots appear
- Week 2–3: Strong roots establish
- Month 1: Leaf growth strengthens
- Month 2: Bulbs begin forming
- Month 3–4: Bulbs swell and mature
Instead of waiting 6–8 months, you may harvest in 4–5 months depending on climate.
🧄 When to Harvest Your Garlic
Your garlic is ready when:
- Lower leaves turn yellow
- Tops fall over naturally
- Bulb size is visible under the soil
- Skin becomes papery
Do not pull too early—wait for the right stage to get big, full bulbs.
After harvesting:
- Dry garlic for 3–5 days
- Cure in a shaded, airy place for 2–3 weeks
- Store in a cool, dry place
Cured garlic lasts for months.
🌟 Final Thoughts
Growing garlic with this fast-breeding method is incredibly rewarding. It speeds up growth, increases bulb size, reduces waiting time, and gives you a steady supply of fresh, flavorful garlic right from home.
Whether you’re gardening on a balcony, terrace, backyard, or windowsill, this method works beautifully. It’s simple, effective, and perfect for beginners and experienced gardeners alike.