
Bitter gourd, also known as karela, is a highly nutritious vegetable celebrated for its health benefits, including blood sugar regulation, detoxification, and digestive aid. Despite its popularity, many think that growing bitter gourd is complicated. The good news is that you can grow a bitter gourd plant easily at home, even in small spaces like balconies, terraces, or backyard gardens. This comprehensive guide will walk you through every step to cultivate a healthy, high-yielding bitter gourd plant with minimal effort.
🥒 Why Grow Bitter Gourd at Home?
Homegrown bitter gourd offers numerous benefits:
- Fresh and organic: Free from pesticides and harmful chemicals
- Continuous supply: Grow multiple harvests in a single season
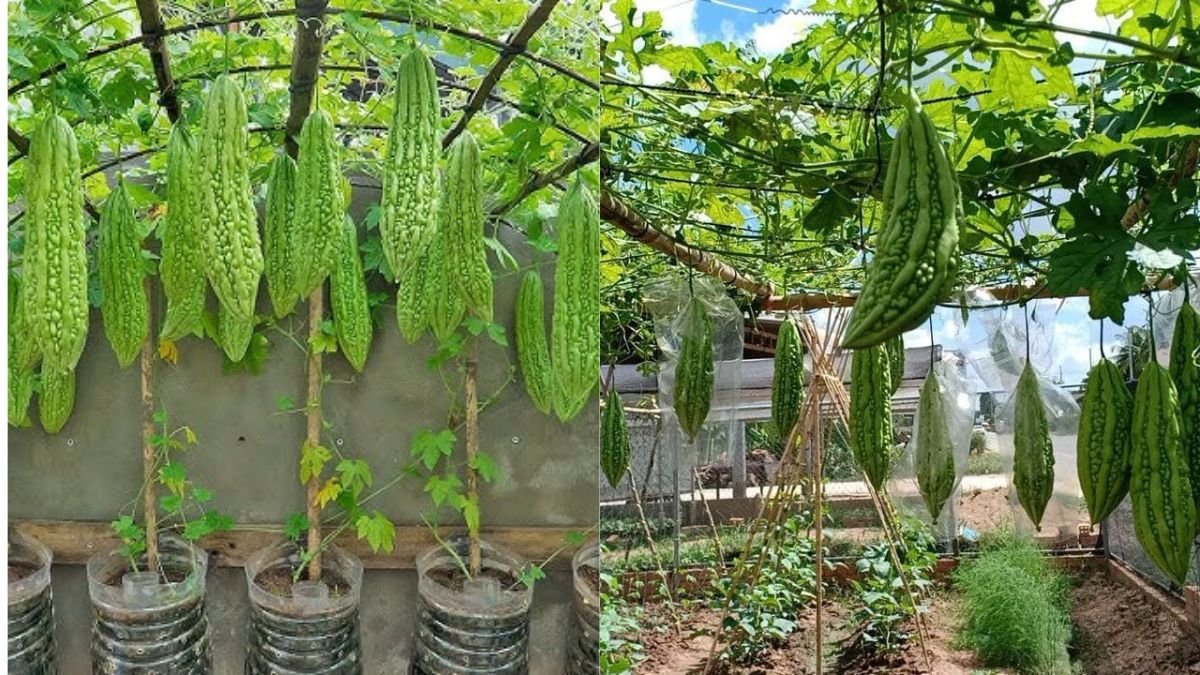
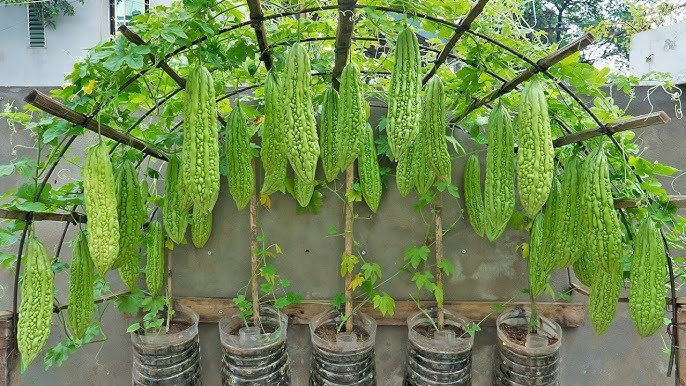
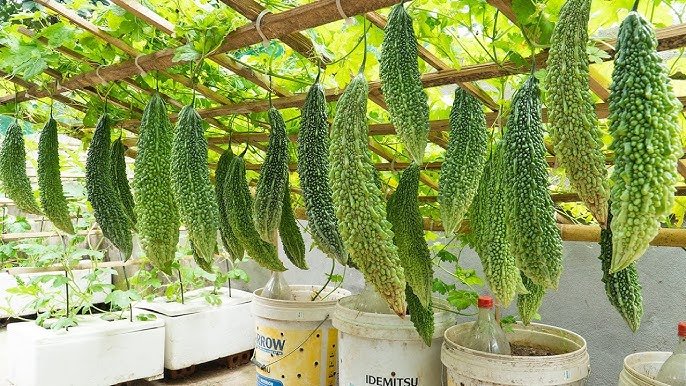
- Space-efficient: Grows well in pots, vertical trellises, or hanging baskets
- Health benefits: Rich in vitamins, minerals, and antioxidants
- Educational and rewarding: Ideal for kids and beginners to understand plant growth
By growing bitter gourd at home, you can enjoy fresh, nutrient-rich vegetables year-round while enhancing your garden’s greenery.
🥒 Understanding the Bitter Gourd Plant
Botanical Name: Momordica charantia
Plant Type: Climbing, annual vine
Growth Habit: Fast-growing creeper
Sunlight Requirement: Full sun
Soil Preference: Well-draining, rich in organic matter
Bitter gourd is a climbing vine, which means it requires a support structure like a trellis, bamboo sticks, or strings to grow optimally.
🥒 Step 1: Selecting the Right Seeds
The first step is choosing high-quality seeds. Look for:
- Fresh seeds from mature, healthy bitter gourds
- Varieties suited to your climate (long, short, or hybrid types)
- Organic or untreated seeds for best germination
Optional Pre-soaking:
Soak seeds in warm water for 8–12 hours before sowing. This softens the seed coat, improves germination, and ensures faster sprouting.
🥒 Step 2: Choosing the Right Soil and Container
Bitter gourd thrives in soil that is:
- Loose, well-draining
- Rich in organic matter
- Slightly acidic to neutral (pH 6–7)
Ideal Soil Mix:
- 40% garden soil
- 30% compost or cow dung manure
- 20% cocopeat or vermicompost
- 10% sand
Container Options:
- Large pots (minimum 12–14 inches deep)
- Grow bags
- Raised beds
- Hanging baskets for vertical growth
Ensure your container has drainage holes to prevent waterlogging, which can cause root rot.
🥒 Step 3: Sowing the Seeds
Bitter gourd seeds can be sown directly in soil or started in seedling trays.
Steps for Direct Sowing:
- Fill the container with prepared soil.
- Plant seeds 1–2 inches deep, spacing them 12–18 inches apart.
- Cover lightly with soil and press gently.
- Water immediately after sowing.
Seedling Tray Method:
- Start seeds in trays or small pots
- Transplant seedlings after 15–20 days when they have 2–3 true leaves
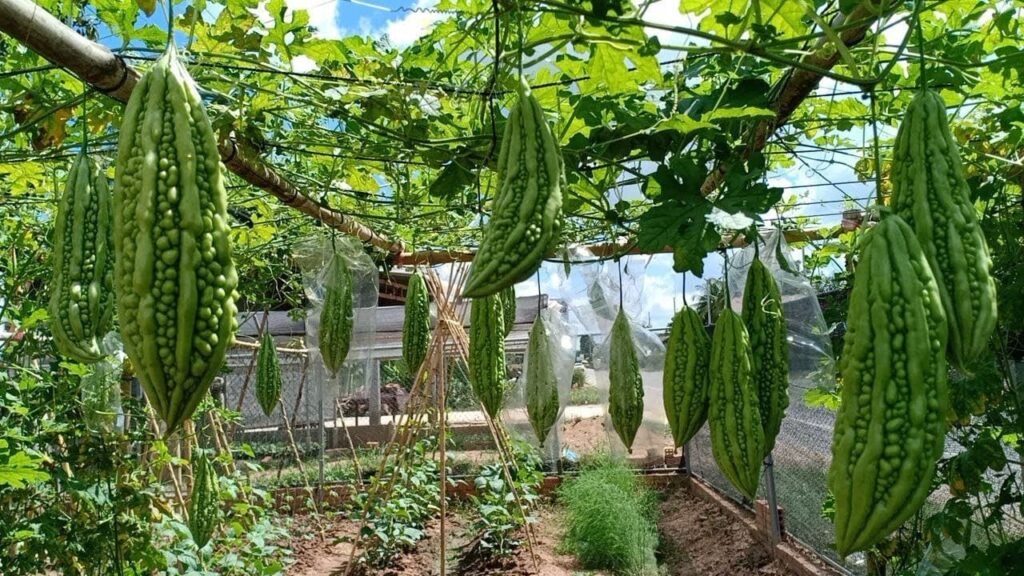
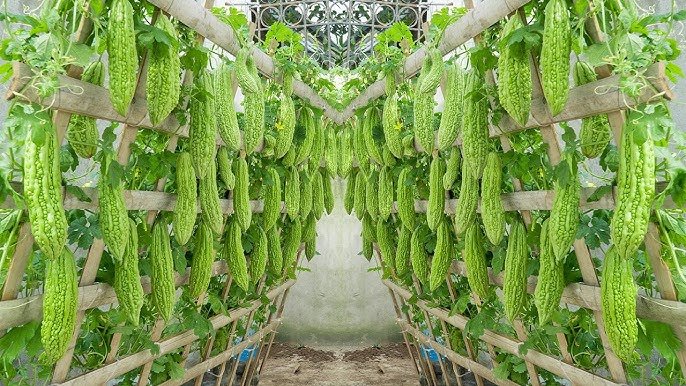
🥒 Step 4: Providing Support for the Vine
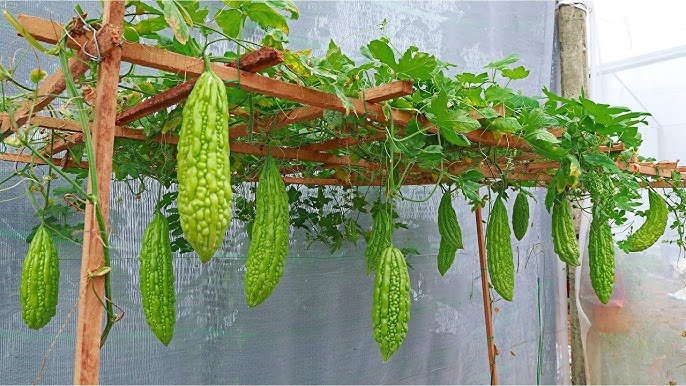
Bitter gourd is a climber, so providing support early is crucial for optimal growth.
Support Options:
- Bamboo poles
- Wooden sticks
- Wire or string trellis
- Netting attached to walls or fences
Tie the vine gently to the support as it grows, helping it climb and spread properly.
🥒 Step 5: Watering Your Bitter Gourd Plant
Bitter gourd requires consistent moisture but dislikes waterlogged soil.
Watering Guidelines:
- Water deeply every 2–3 days during hot weather
- Reduce watering in rainy or cold seasons
- Mulch with straw, dry leaves, or husk to retain moisture and prevent soil drying
Proper watering helps the plant produce healthy leaves, flowers, and fruits.
🥒 Step 6: Sunlight and Temperature Requirements
Bitter gourd plants thrive in full sunlight.
- Daily sunlight: Minimum 6–8 hours
- Optimal temperature: 24–30°C
- Avoid frost and extreme cold, as it slows growth
If growing indoors or on a balcony with limited sunlight, consider using a reflective surface or placing the plant in a sunniest spot.
🥒 Step 7: Fertilizing for High Yield
Bitter gourd is a heavy feeder, so regular feeding improves both vine growth and fruit production.
Organic Fertilizers:
- Vermicompost or cow dung every 3–4 weeks
- Liquid seaweed or compost tea every 15 days
- Banana peel fertilizer for potassium during flowering
Optional Mineral Fertilizers:
- Balanced NPK (10:10:10) once every month for stronger vines
- Avoid excess nitrogen, which promotes leafy growth over fruits
🥒 Step 8: Pollination and Flowering
Bitter gourd produces male and female flowers.
- Male flowers appear first, followed by female flowers (with a tiny ovary at the base)
- Bees, butterflies, and hand pollination improve fruit set
- Gently transferring pollen from male to female flowers can increase yields
Flowering occurs 30–40 days after sowing, depending on the climate and care.
🥒 Step 9: Pruning and Vine Management
Pruning ensures healthy growth, better air circulation, and more fruit production.
Pruning Tips:
- Remove weak, yellow, or dead leaves
- Trim excessive side shoots to focus energy on fruit-bearing vines
- Train long vines along the trellis for better sunlight exposure
Regular pruning prevents disease and keeps the plant manageable in limited spaces.
🥒 Step 10: Pest and Disease Management
Bitter gourd is prone to a few common pests:
Common Pests:
- Aphids
- Fruit flies
- Red pumpkin beetles
- Spider mites
Natural Pest Solutions:
- Neem oil spray every 2–3 weeks
- Garlic or chili water sprays
- Handpicking beetles or affected fruits
- Ensure good air circulation to prevent fungal infections
Healthy plants are less susceptible to pests and diseases.
🥒 Step 11: Harvesting Your Bitter Gourds
Bitter gourds grow quickly, and the first harvest is usually 50–60 days after planting.
Harvesting Tips:
- Pick fruits when they are green and firm, before turning yellow
- Cut with scissors or a sharp knife to avoid damaging the vine
- Harvest regularly to encourage continuous fruiting
Regular harvesting ensures a steady supply of fresh bitter gourd.
🥒 Step 12: Long-Term Care and Tips
- Mulch regularly to conserve moisture
- Provide trellis support for new shoots
- Feed with compost during the growing season
- Replace old or weak vines after 2–3 harvest cycles for maximum yield
- Monitor for pests and prune when necessary
With proper care, bitter gourd plants can continue producing for up to 6–8 months, depending on the climate.
🥒 Why This Method Works Well for Home Gardening
This method is ideal for home gardeners because it:
✔ Requires minimal space and resources
✔ Provides continuous harvests
✔ Uses organic and easily available fertilizers
✔ Encourages vertical growth, saving space
✔ Is beginner-friendly and low-maintenance
Even if you have a small balcony or terrace, you can grow healthy, high-yielding bitter gourd plants.
🥒 Final Thoughts
Growing bitter gourd at home is simple, rewarding, and highly beneficial for your health. With the right seeds, soil, support, sunlight, and consistent care, you can enjoy fresh, organic bitter gourd fruits from your own garden or balcony.
From seed sowing to trellis training, regular fertilization, and careful pest management, this method ensures that even beginner gardeners can successfully cultivate bitter gourd plants at home.
Start today, and in just a few weeks, you’ll see lush green vines climbing your trellis and producing bitter gourds that are fresher and healthier than anything from the market.