
Watering plants efficiently is a challenge for many gardeners. Too little water can stunt growth, while overwatering can damage roots and waste resources. This is where drip irrigation comes in—a method that delivers water directly to the roots of plants, reducing waste and ensuring consistent moisture. Creating your own drip emitters is easier than you think, and it’s a cost-effective way to provide your plants with the perfect amount of water. In this guide, you’ll learn step by step how to make DIY drip emitters that can transform your garden, balcony, or indoor plants.
1. Why Drip Irrigation Matters
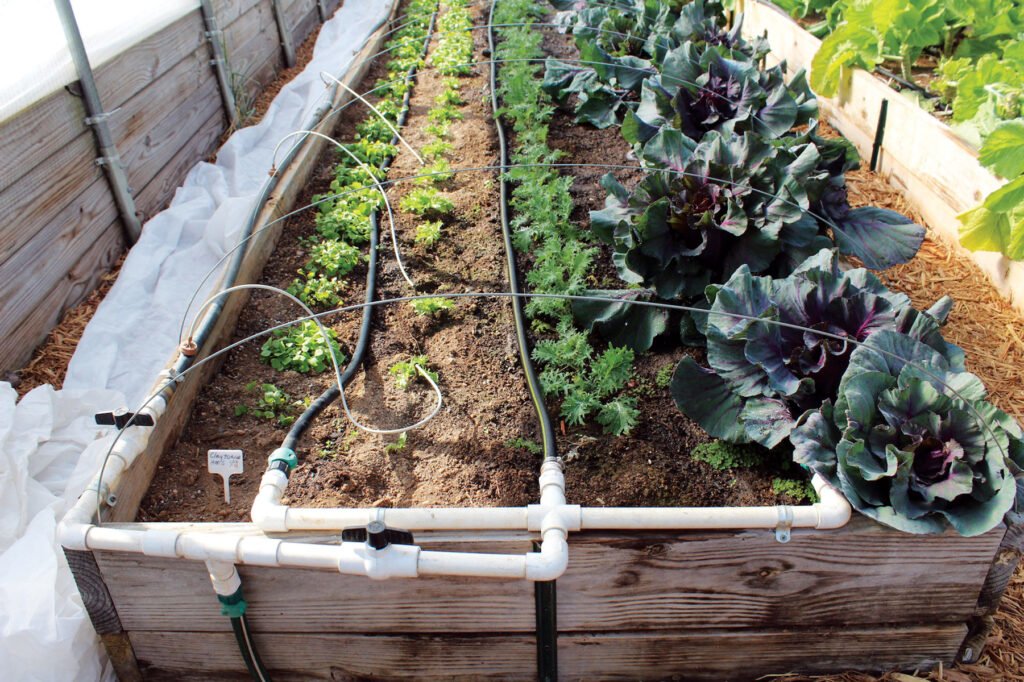
Drip irrigation is a watering method that mimics natural rainfall, delivering water slowly and directly to plant roots. Unlike traditional watering methods, drip irrigation:
- Conserves water by reducing evaporation and runoff.
- Promotes healthy plant growth by providing consistent moisture.
- Reduces the risk of diseases caused by water splashing onto leaves.
- Saves time, especially for larger gardens or container plants.
Creating your own drip emitters allows you to customize the flow rate for each plant, making it perfect for gardens with different water needs.
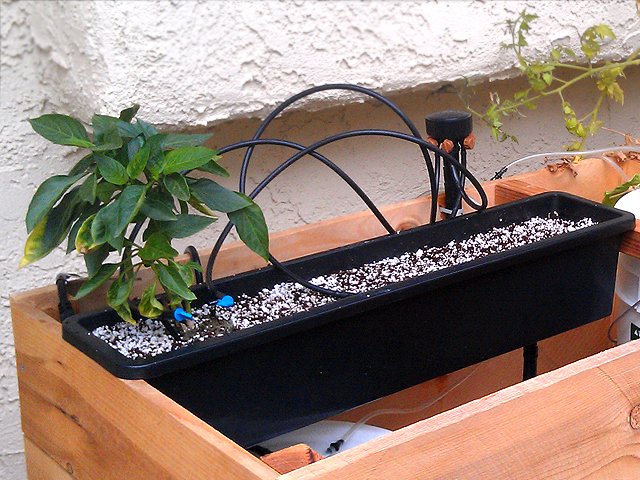
2. Understanding Drip Emitters
Drip emitters are small devices that control the flow of water to your plants. They can be purchased pre-made, but making your own DIY emitters is inexpensive, easy, and fun. Basic drip emitters work by:
- Releasing water slowly over time.
- Allowing precise control over the watering rate.
- Being adjustable for different plant sizes and soil types.
3. Materials Needed to Create Drip Emitters
Before starting, gather these simple materials, most of which you may already have at home:
- Plastic bottles: Small soda or water bottles work perfectly.
- Plastic tubing or straws: To direct water to the roots.
- Pins, nails, or small drill bits: To create small holes for water flow.
- Scissors or knives: For cutting tubing and bottles.
- Water container: Can be a bucket, tank, or large bottle.
Optional: A silicone sealant or tape to prevent leaks at joints.
4. Step-by-Step Guide to Creating Drip Emitters
Step 1: Prepare the Container
Choose a water container that suits your garden size. For small gardens, a 2-liter bottle is enough, while larger setups may need a bucket or water tank.
Step 2: Make Small Holes
- For bottle-based emitters, poke small holes near the bottom using a pin or nail.
- Start with 1-2 holes and test the flow rate. You can make them slightly bigger if water drips too slowly.
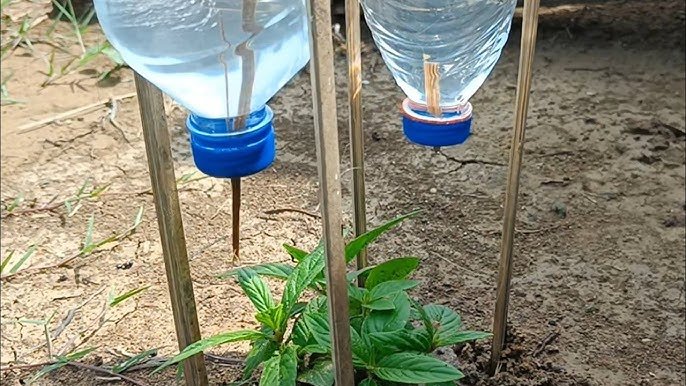
Step 3: Add Tubing (Optional)
- If you want to direct water precisely to each plant, insert a straw or thin tubing into each hole.
- Position the end of the tube near the plant’s root zone.
Step 4: Position Your Emitters
- Place the bottles or containers at the base of each plant.
- For raised beds or pots, make sure the water drips evenly across the soil.
Step 5: Adjust Flow Rate
- Fill the container with water and observe the dripping speed.
- If it’s too fast, use smaller holes or cover partially with tape.
- If too slow, enlarge the hole slightly.
5. Alternative Drip Emitter Designs
There are a few creative ways to make your DIY drip emitters:
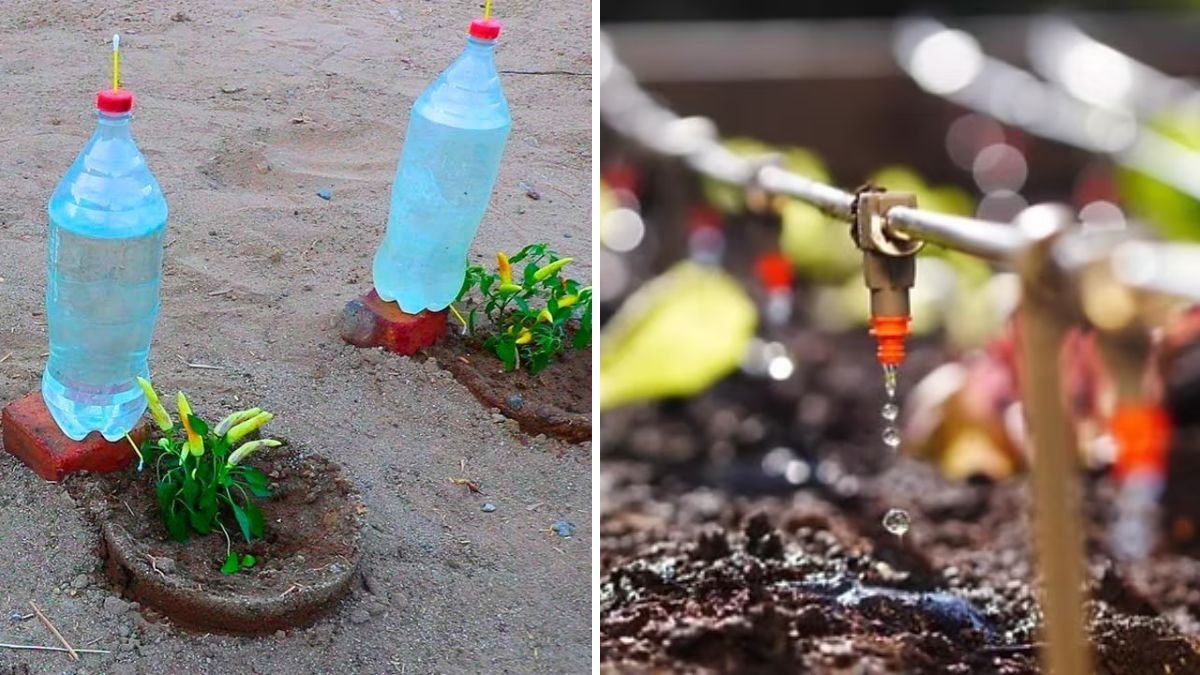
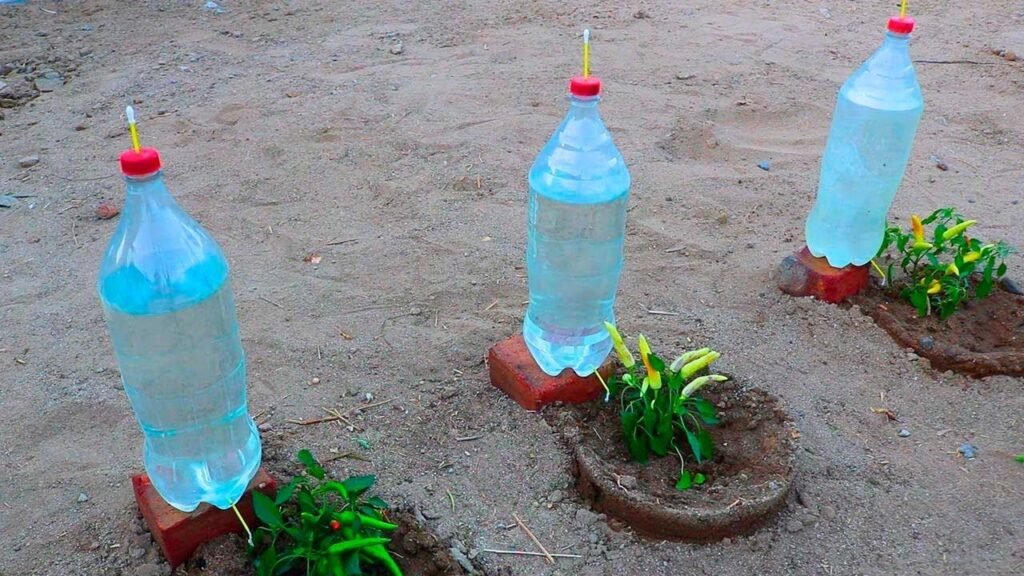
- Upside-Down Bottle Method:
- Poke holes in the cap and fill the bottle with water.
- Invert it into the soil next to the plant. Gravity will slowly drip water into the soil.
- Plastic Straw Emitters:
- Cut a straw into 2-3 inch pieces.
- Poke small holes along the side and connect them to a water container.
- Insert into the soil near plant roots.
- Clay Pot Irrigation:
- Use a small unglazed clay pot.
- Bury it partially in soil and fill it with water.
- Water seeps slowly through the porous walls, hydrating the soil gradually.
6. Benefits of DIY Drip Emitters
- Cost-effective: Reuse plastic bottles, straws, or old containers.
- Customizable: Adjust water flow for each plant’s needs.
- Water-efficient: Reduces water usage by up to 50% compared to traditional watering.
- Time-saving: Reduces the frequency of watering, especially during hot summer months.
- Scalable: Perfect for small balcony gardens or large vegetable patches.
7. Maintenance Tips
Even the best DIY drip emitters need regular care:
- Check for Clogs: Small holes may get blocked with dirt or algae. Clean with a pin or brush.
- Refill Water: Make sure containers or bottles are topped up regularly.
- Adjust Flow: As plants grow, they may need more water. Increase the hole size or number of emitters accordingly.
- Inspect Tubing: Replace damaged or kinked tubes to maintain smooth water flow.
8. Using DIY Drip Emitters for Different Plants
- Vegetables: Tomatoes, peppers, cucumbers, and lettuce thrive with consistent drip irrigation.
- Fruit Trees: Drip emitters provide deep watering, promoting strong root systems.
- Indoor Plants: Small bottles with pins work perfectly for pots and planters.
- Flowers and Herbs: Maintain soil moisture without overwatering delicate flowers.
9. Enhancing Your DIY Drip System
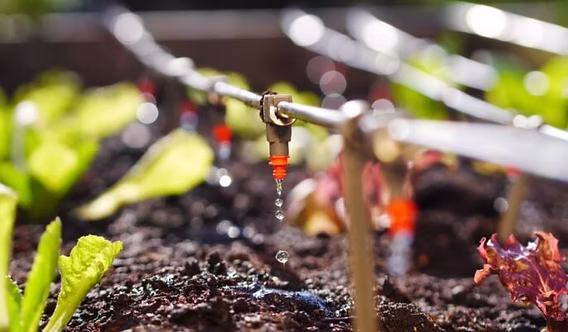
For more advanced setups, you can:
- Use a timer to automate watering.
- Connect multiple bottles with tubing to water multiple plants simultaneously.
- Install a filter at the main water source to prevent clogs.
- Use colored bottles to reduce algae growth in sunny areas.
10. Eco-Friendly and Sustainable Gardening
Creating your own drip emitters is not just about saving water—it’s also an eco-friendly gardening practice:
- Recycling Plastic: Old bottles and straws get a second life as irrigation tools.
- Reducing Waste: Watering directly at the roots reduces runoff and soil erosion.
- Conserving Water: Especially important in areas with water scarcity.
By embracing DIY drip irrigation, you can cultivate healthy plants while reducing your environmental footprint.
Conclusion
Learning to create drip emitters is a simple yet transformative gardening skill. With just a few household items, you can ensure your plants receive the perfect amount of water, conserve resources, and enjoy healthier growth. Whether you’re tending a small balcony garden, a raised bed, or a backyard vegetable patch, DIY drip irrigation is a cost-effective, customizable, and eco-friendly solution.
Start small, experiment with different designs, and adjust as you go. Soon, you’ll see the benefits of your careful planning in thriving, well-hydrated plants. Water wisely, grow smart, and enjoy the satisfaction of creating a garden that flourishes with every drip.