
Gardening is no longer limited to sprawling backyards or fertile plots of land. With creativity and innovation, even small apartments or balconies can be transformed into productive green spaces. One of the most exciting trends in urban gardening is growing plants in bottles. This method is not only space-saving but also cost-effective, visually appealing, and an excellent way to recycle plastic or glass bottles.
Growing in bottles allows gardeners to cultivate vegetables, herbs, and ornamental plants in confined spaces, while also teaching innovative techniques such as vertical gardening, hydroponics, and self-watering systems. In this guide, we’ll explore step-by-step methods, tips, and benefits of growing in bottles, helping you turn everyday containers into thriving mini-gardens.
Why Grow in Bottles?
Growing plants in bottles has several advantages, making it perfect for modern urban living:
✔ Space-Saving
Stack, hang, or line bottles vertically to maximize even the smallest spaces.
✔ Cost-Effective
Recycling plastic or glass bottles reduces waste and cuts down on gardening expenses.
✔ Portable and Lightweight
Bottles are easy to move, making them perfect for balconies, windowsills, and rooftop gardens.
✔ Controlled Environment
Growing in bottles allows you to manage soil, water, and nutrients effectively.
✔ Educational and Fun
This technique is ideal for teaching children about plant growth, sustainability, and creative gardening.
✔ Visual Appeal
Bottles can be arranged vertically or horizontally, creating a green wall or decorative garden.
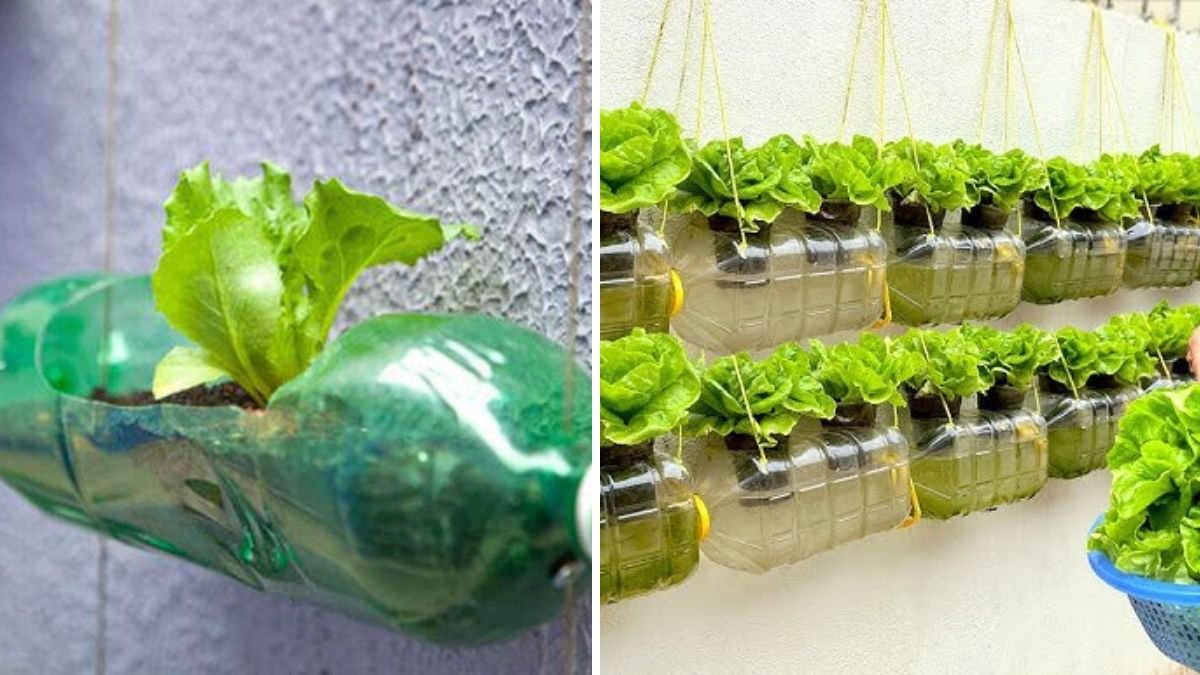
Step 1: Selecting the Right Bottles
Not all bottles are ideal for gardening. The type, size, and material matter for plant health.
Best Bottles
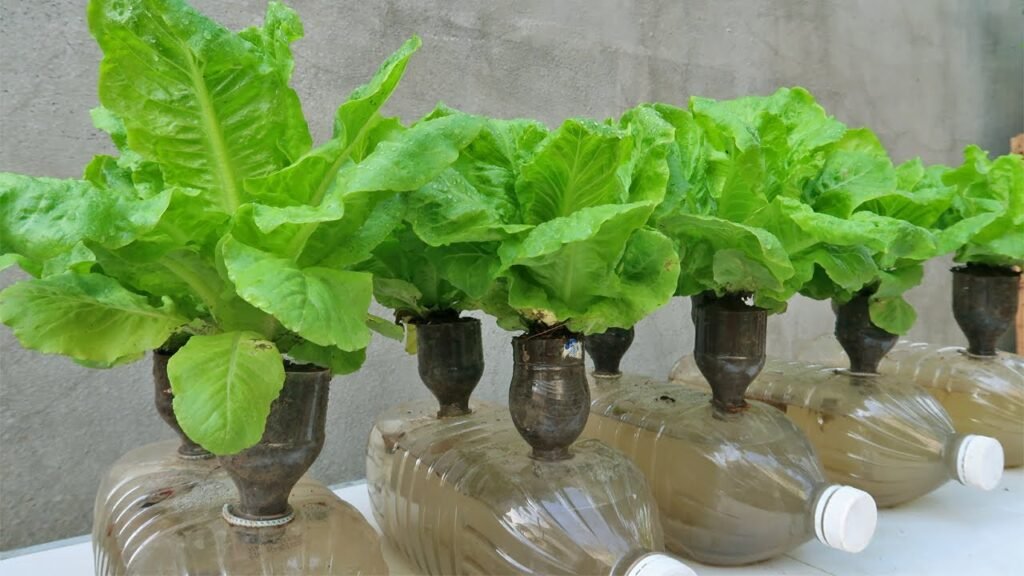
- Plastic Bottles: Lightweight, easy to cut and drill, transparent for hydroponics or observing roots.
- Glass Bottles: Durable and elegant for decorative plants or water-based growth.
- Large Soda or Juice Bottles: Perfect for deeper root systems.
- Small Bottles: Suitable for herbs, microgreens, or succulents.
Tips
- Ensure bottles are clean to remove any residues.
- Avoid bottles with toxic labels or chemical remnants.
- Cut or modify carefully, using sharp tools for smooth edges.
Step 2: Preparing Bottles for Planting

Before planting, bottles need modifications for drainage and airflow.
For Soil-Based Planting
- Cut the bottle horizontally or vertically depending on placement.
- Drill 3–5 holes at the bottom for drainage.
- Optional: Add small stones or gravel at the bottom to prevent soil clogging.
For Hydroponic or Water-Based Systems
- Leave the bottle mostly intact to hold water.
- Cut a small opening at the top to insert plant stems or nets.
- Use cotton wicks or mesh to hold plants in place over water.
Tip: Mark water levels clearly to maintain consistent hydration.
Step 3: Choosing the Right Plants for Bottles
Bottle gardening is best for small, compact, or fast-growing plants.
Ideal Plants
- Vegetables: Lettuce, spinach, kale, cherry tomatoes, peppers, radishes
- Herbs: Basil, mint, cilantro, parsley, oregano
- Root Crops: Carrots, radishes, green onions (require deeper bottles)
- Ornamentals: Ferns, pothos, succulents, air plants
Tips
- Choose plants with shallow or moderate root systems for smaller bottles.
- For vertical bottles, vining plants like tomatoes or peas work well with support.
Step 4: Preparing Soil or Growth Medium
For Soil-Based Bottles
- Use a light, well-draining mix:
- 40% garden soil
- 40% compost or cocopeat
- 20% sand or perlite for aeration
- Add slow-release fertilizer for nutrients.
For Hydroponics
- Use water enriched with liquid nutrients.
- Add a net cup or floating medium like hydroton clay pebbles.
- Ensure plants are suspended with roots submerged in nutrient solution.
Step 5: Planting in Bottles
Soil-Based Planting
- Fill the bottle with soil mix, leaving 1–2 inches at the top.
- Plant seeds or seedlings at the recommended depth.
- Water gently to avoid washing soil away.
Hydroponic Planting
- Place seedlings in net cups or small soil plugs.
- Position the plant so roots touch the nutrient solution.
- Ensure plants are upright and stable using cotton wicks or mesh support.
Tip: Label each bottle for easy identification of plant types and planting dates.
Step 6: Watering and Nutrient Management
Watering in bottles requires attention since containers are limited in soil volume.
Soil-Based Bottles
- Water lightly but consistently to keep soil moist.
- Avoid overwatering, which can cause root rot.
- Fertilize every 2–3 weeks with organic liquid fertilizer.
Hydroponic Bottles
- Maintain nutrient solution levels.
- Replace water and nutrients every 1–2 weeks to prevent stagnation.
- Monitor pH and EC (electrical conductivity) for healthy growth.
Tip: Transparent bottles allow you to monitor water levels and root health easily.
Step 7: Light Requirements
Plants in bottles still need adequate sunlight for photosynthesis.
Guidelines
- Place bottles where plants get 6–8 hours of sunlight daily.
- For indoor setups, use LED grow lights to supplement natural light.
- Rotate bottles periodically to ensure even growth on all sides.
Step 8: Supporting Plants in Bottles
Some plants, especially vining types, need support.
Support Methods
- Use bamboo sticks or toothpicks to guide growth.
- For vertical arrangements, tie plants gently to string or mesh.
- Trim plants regularly to prevent overcrowding.
Step 9: Pest and Disease Management
Even small bottle gardens can face pests or fungal problems.
Common Pests
- Aphids, mites, whiteflies, and fungus gnats
Organic Solutions
- Spray neem oil or mild insecticidal soap.
- Remove damaged leaves promptly.
- Ensure proper drainage and airflow to reduce fungal infections.
Step 10: Harvesting from Bottle Gardens
Harvesting depends on plant type.
Vegetables
- Pick leafy greens as soon as they reach 4–6 inches.
- Harvest fruits like cherry tomatoes or peppers when fully colored.
Herbs
- Trim outer leaves, leaving 1/3 of the plant intact to continue growing.
Root Crops
- Gently remove soil or tip bottle to retrieve carrots, radishes, or onions.
Tip: Frequent harvesting encourages continuous growth and prevents overcrowding.
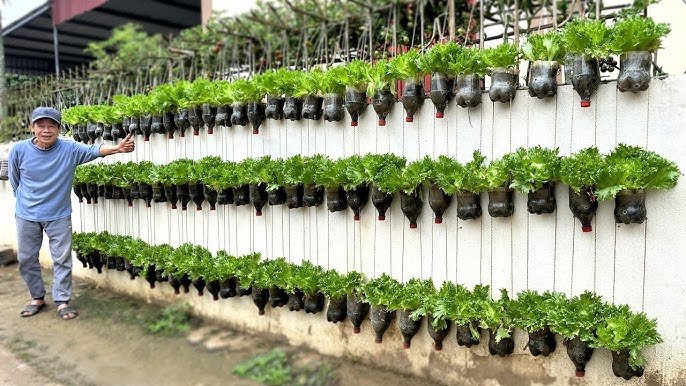
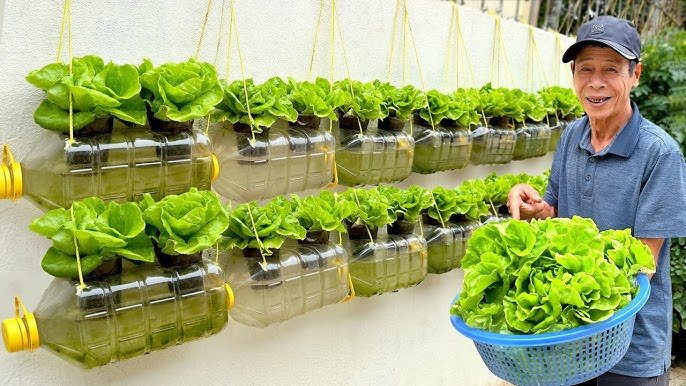
Step 11: Creative Bottle Garden Arrangements
Bottles can be arranged in multiple ways to enhance space utilization and aesthetics:
- Vertical Gardens: Hang bottles with strings from ceilings or balconies.
- Stacked Towers: Use crates or stands to stack bottles vertically.
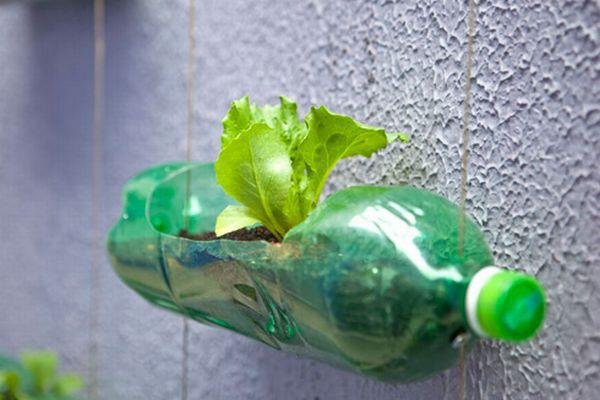
- Wall Gardens: Attach bottles horizontally on walls with cut openings for plants.
- Window Sills: Place bottles along window sills for maximum sunlight.
Tip: Experiment with different arrangements for functional and decorative purposes.
Step 12: Benefits of Growing in Bottles
- Sustainable Gardening: Recycles plastic and reduces waste.
- Space Efficiency: Ideal for apartments and urban spaces.
- Low-Cost Setup: Minimal investment in containers.
- Easy Maintenance: Small soil volumes are manageable and portable.
- Educational: Great for teaching children about plant growth and ecology.
- Aesthetic Appeal: Adds greenery and life to indoor or outdoor spaces.
Step 13: Tips for Year-Round Bottle Gardening
- Grow different crops in succession to maximize harvest.
- Use grow lights during winter or in low-light areas.
- Rotate plants periodically to maintain soil and nutrient health.
- Monitor for pests and replace old soil as needed.
- Combine hydroponic and soil-based bottles for variety.
Conclusion: Transform Any Space with Bottle Gardening
Growing in bottles is a versatile, eco-friendly, and rewarding method for gardeners of all skill levels. By selecting suitable bottles, preparing soil or hydroponic systems, choosing the right plants, and maintaining water, light, and nutrients, you can cultivate fresh vegetables, herbs, and ornamental plants anywhere—even in small apartments or limited outdoor spaces.
This approach not only maximizes limited space but also promotes sustainability and creativity. Whether for aesthetic decoration, fresh kitchen produce, or educational purposes, bottle gardening is an innovative way to bring greenery into your life. With patience and care, your bottle garden can become a thriving mini-ecosystem that produces continuous harvests and adds beauty to your surroundings.